Building a free as in freedom server on a budget
2021-01-11
As may be brought to your attention in my previous blogpost everything Jiyu Software runs on completely free software. Today, I’d like to share the complete build process of the hardware that makes all of this possible.
Picking a motherboard
Because of non-free BIOS software the amount of hardware that is capable to run without any proprietary software is currently very limited. Any chipsets made by AMD after 2012 and any chipsets made by Intel after 2008 are already out of the question.
The best option for a completely free motherboard is avoiding the x86 architecture altogether and using an IBM POWER9 motherboard with OpenPOWER, such as the Talos II Mainboard. While I absolutely love this idea, currently the pricing of a Talos II board starts at $1500 without even including a CPU. I would definitely consider buying one of these in the future at a time when an investment like this makes sense for me to do so. So, I went back to looking for an x86 motherboard I could use.
Intel has a few motherboards available that use a 755 socket (Intel Core 2 Duo), which is very similar to my Thinkpad X200. While these motherboards are what I consider fine for average desktop usage, two cores are not gonna cut it for the things that I want my server to do.
Eventually I ended up going with team AMD. All the free software compatible motherboards with AMD chipsets are intended for workstations and servers. In this case I’m building a server so that is exactly what I need.
Not wanting to go into great depth explaining the differences between the available AMD motherboards I ended up going for the ASUS KCMA-D8 motherboard. This motherboard supports the C32 CPU socket. However it has a dualsocket design, allowing you to use 2 CPUs which is a good way to compensate for the outdated architecture. This board also fits conveniently in a standard ATX case. At the time of writing you can get this motherboard for about €350 which fits into my budget a lot better than the Talos II.
Getting the parts
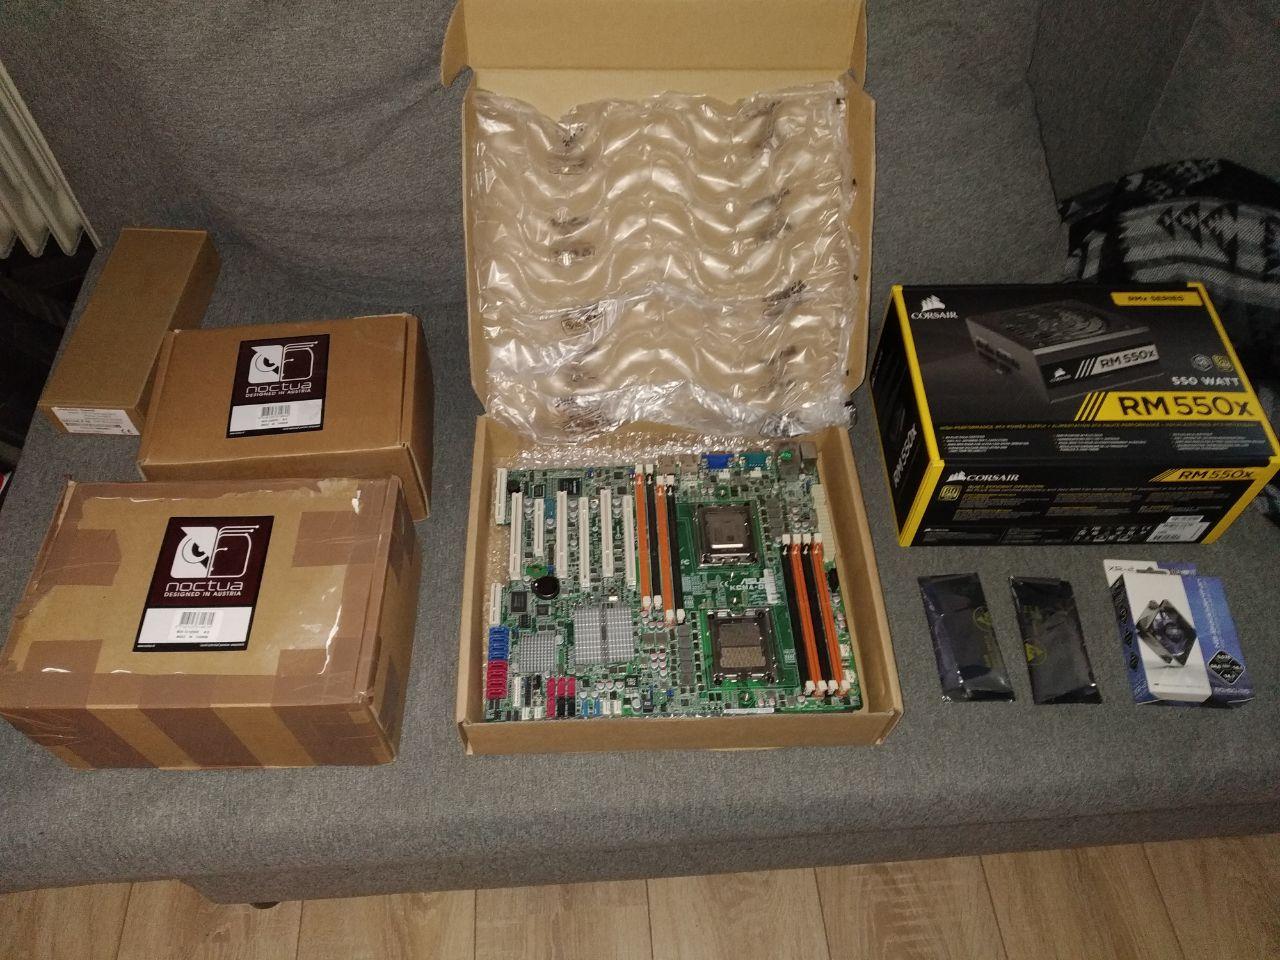
Getting the parts for this build was not the easiest task in the world. Most of the parts I need for this build to work are no longer produced and are not easy to find.
The motherboard
Getting the motherboard was easy thanks to Vikings. I’ve first heard about these guys at FOSDEM in 2018. This Germany based company sells refurbished free software compatible hardware and runs free software hosting solutions as well. They sell a ASUS KCMA-D8 with free boot firmware preinstalled and it is RYF certified.
Their hardware comes with a 2 year warranty and their support is eager to help you out with your build. If you want your own free computer without going through all the same trouble scavenging parts from all over the world like I did I recommend buying their D8 prebuilt computer.
The CPUs
Like most parts in this list the C32 socket CPUs that this motherboard needs are long discontinued. I was lucky to find an eBay seller from the United States who was selling a lot of used Opteron 4284 CPUs for only $25 each. I picked up 2 of them to fit the two CPUs slots on the motherboard and prayed they worked.
With 8 cores and threads, a base clock of 3 GHz and boost clock of 3.7 GHz this was quite a high-end option at the time when these CPUs were produced. Especially if you have 2 of them they can easily keep up with the average desktop computer produced today.
The only real downside of this CPU is that it uses the AMD Bulldozer architecture, which is known for having quite a high thermal design power (TDP) compared to newer CPUs. But personally I think a little higher power consumption is a small price to pay for freedom.
The quest for coolers
The hardest parts to find for this computer were the CPU coolers. Not surprisingly, there are not a lot of coolers available for C32 sockets nowadays. On sites like eBay and AliExpress you can find copper blocks that work on this socket which are fine in a rack in a datacenter somewhere. But this computer lives in my living room, so I need something quieter. Maybe mostly for aesthetic reasons as well, nothing visually screams “I have power” like a dualsocket motherboard with two giant coolers on it.
It turns out that Noctua used to make coolers for C32 sockets, a 120mm and 90mm version. I quickly found a Dutch store that still had 2 of the 120mm versions in stock and ordered them. Upon arrival I found out that they only sent me a single cooler and charged me back the money for the second cooler because there was a stock error on their listing.
Now I only had a single Noctua cooler for my dualsocket sytem and finding a second one wasn’t gonna be easy. I searched for this cooler on almost every single European computer store. During this quest I’ve learned how to say “out of stock” and “discontinued” in about 15 different languages.
Eventually I found a 90mm Noctua cooler in the refurbished section on Coolmod.com, a Spanish hardware supplier. There was one problem however, Coolmod does not sent packages outside of Spain and Portugal. I signed up for a Spanish mail forwarding service and about a month later I was to be able to receive my cooler in the Netherlands.
Now I had two Noctua coolers for my system, a 120mm and 90mm. Unfortunately not a matching pair but it will have to do the trick.
The power supply
The PSU is the only off-the-shelve part I’ve used while building this computer. Power supplies haven’t changed at all in the past 10 years and mostly still come with the same connectors. I ended up buying a Corsair RM550x because it has a 80plus Gold rating. A high power efficiency rating is important for a computer that will stay on all day and night.
The RAM
The ASUS KCMA-D8 motherboard has 8 slots for DDR3 memory. What’s great about this motherboard is that also supports Error-correcting code (ECC) memory. ECC memory can detect and correct when data corruption occurs. This is a feature that you will typically not find on your average desktop computer because it is only really necessary in critical systems.
Currently I’ve installed 16 GB of non-ECC DDR3 memory that I’ve already had lying around. If I ever think 16 GB of RAM is no longer sufficient I will definitely upgrade to ECC supported RAM sticks.
Building the computer
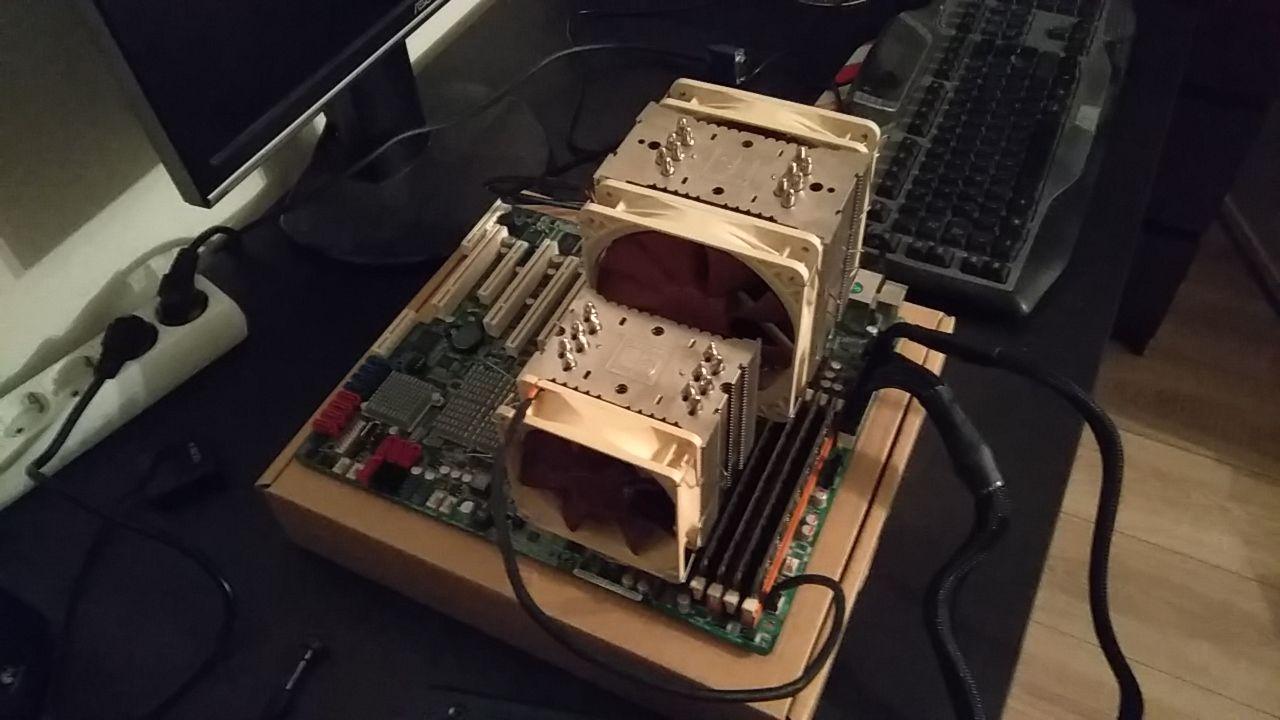
Building a computer with mostly second hand parts is always very exciting. You’re never sure if everything is gonna work if you build a PC from parts that previous owners probably considered a pile of random old junk.
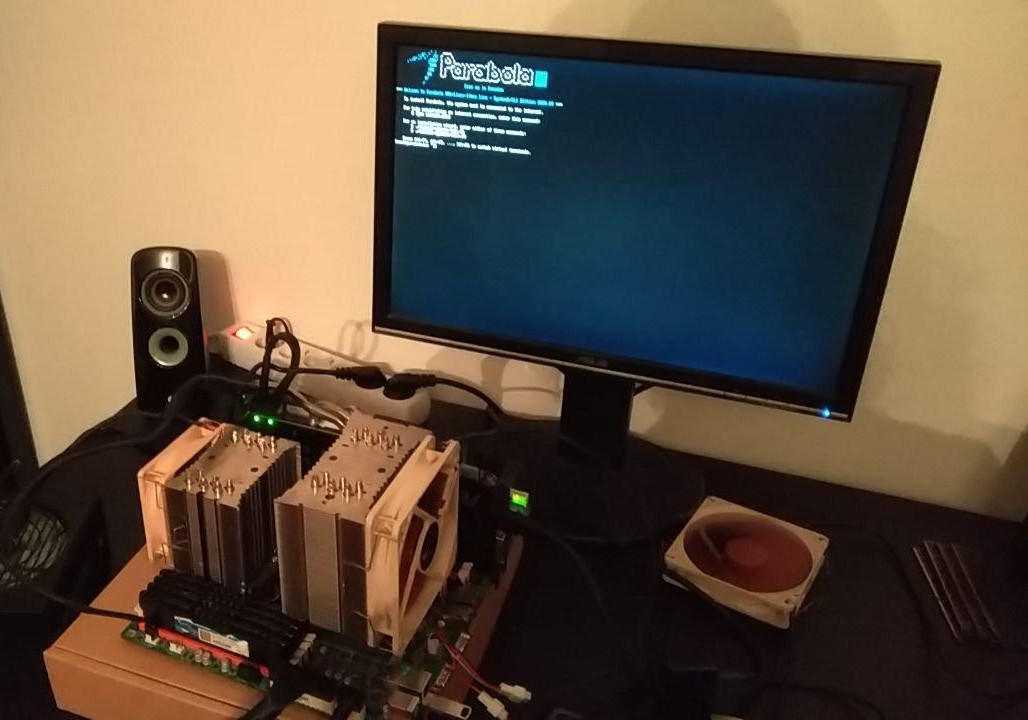
First thing I noticed while building this computer is this board was quite picky when it comes to RAM. I have a pile of random assorted DDR3 RAM sticks. With trial and error I eventually found a set of memory that worked and the computer managed to post. Below is the computer booting from a Parabola LiveUSB for the first time.
Now to check if both the used CPUs from eBay are functioning I ran nproc.
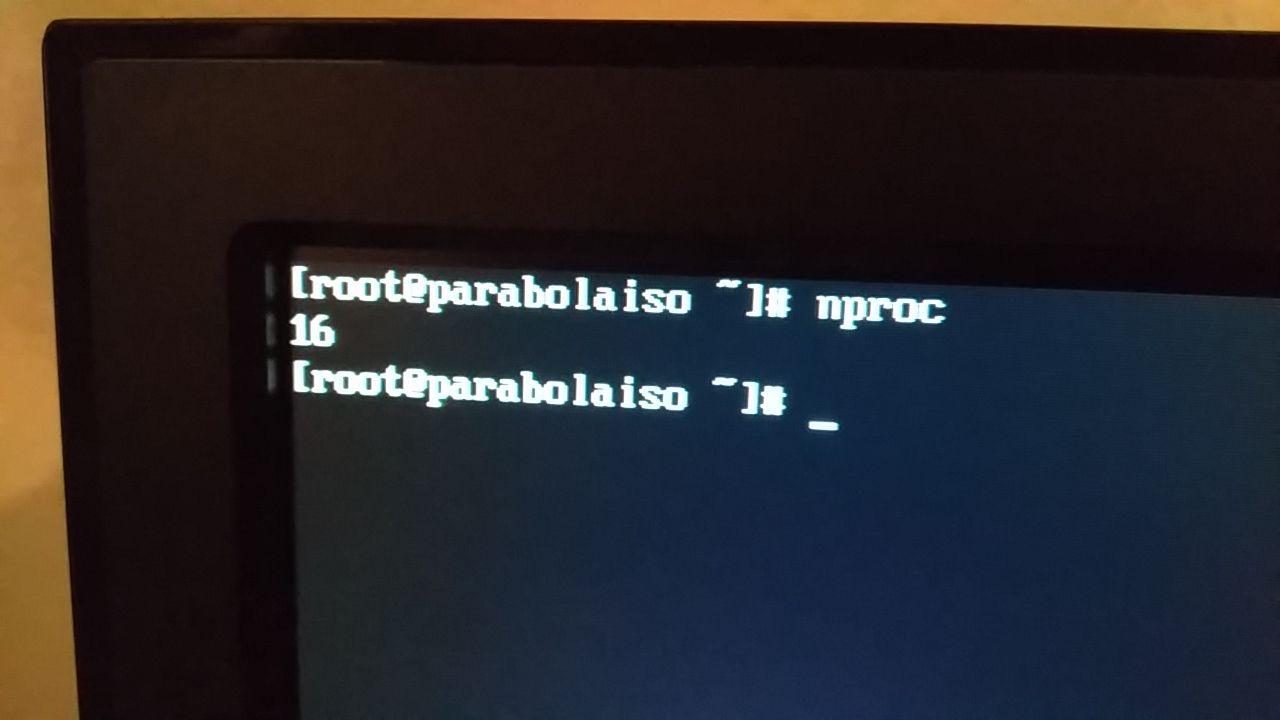
And it detects all 16 physical cores!
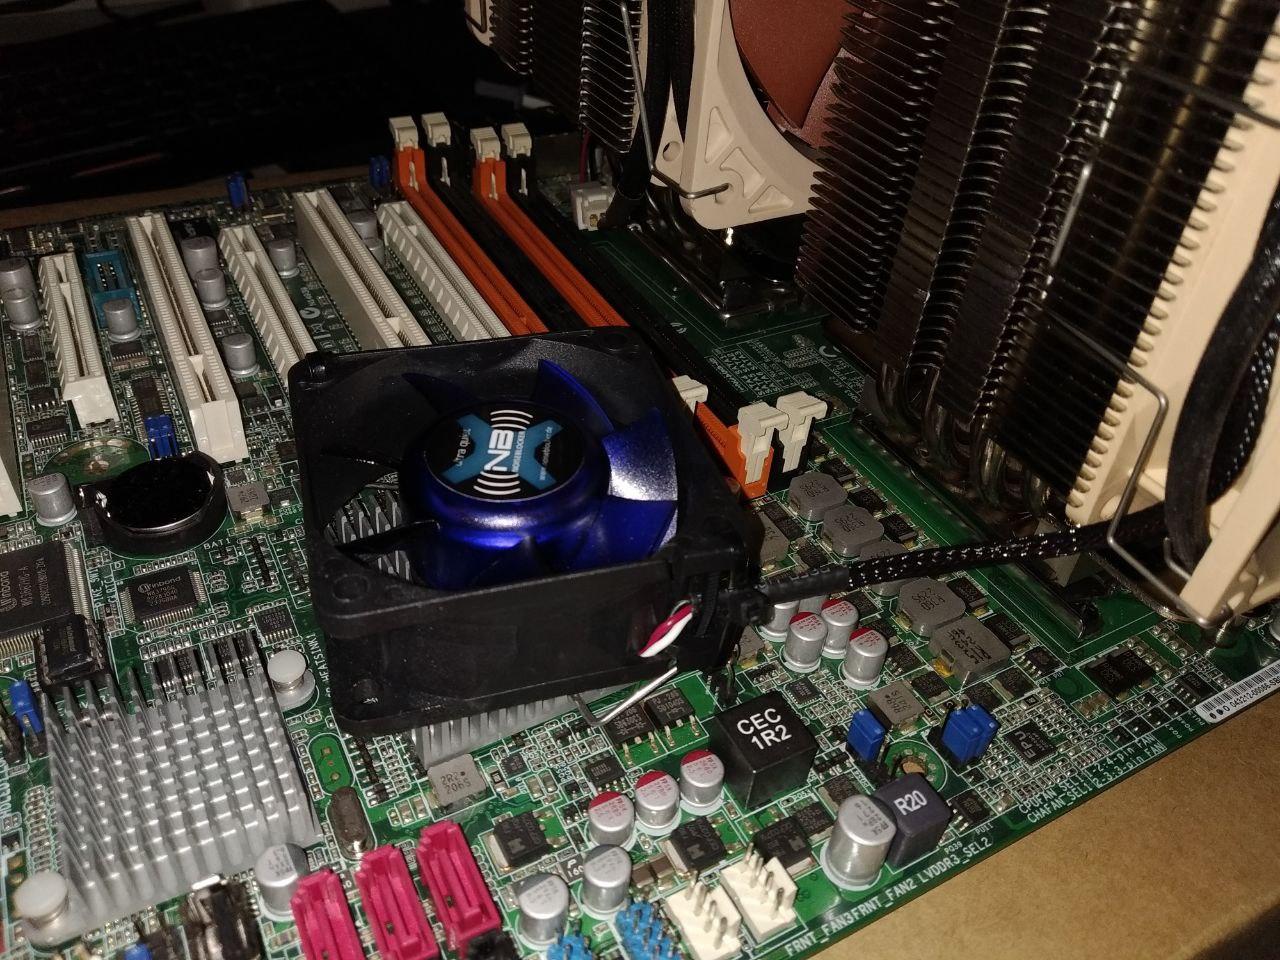
According to Vikings this particular motherboard can get pretty hot on the southbridge. They suggest installing a fan on the southbridge cooling block.
At first I was a little confused because there doesn’t seem to be any place to mount a fan on the cooling block. I e-mailed Vikings about how I’m supposed to do this and I got the following reply:
With the zip ties that have been included in the shipment :) Perhaps not very sophisticated but does its job.
- Thomas, Vikings GmbH
So that’s what I did, and indeed it does the job.
Now all that’s left to do is move the server into a case and connect my 4 hard drives. I will be running these in a RAID 10 config. I might add SSDs to the server to speed it up in the future.
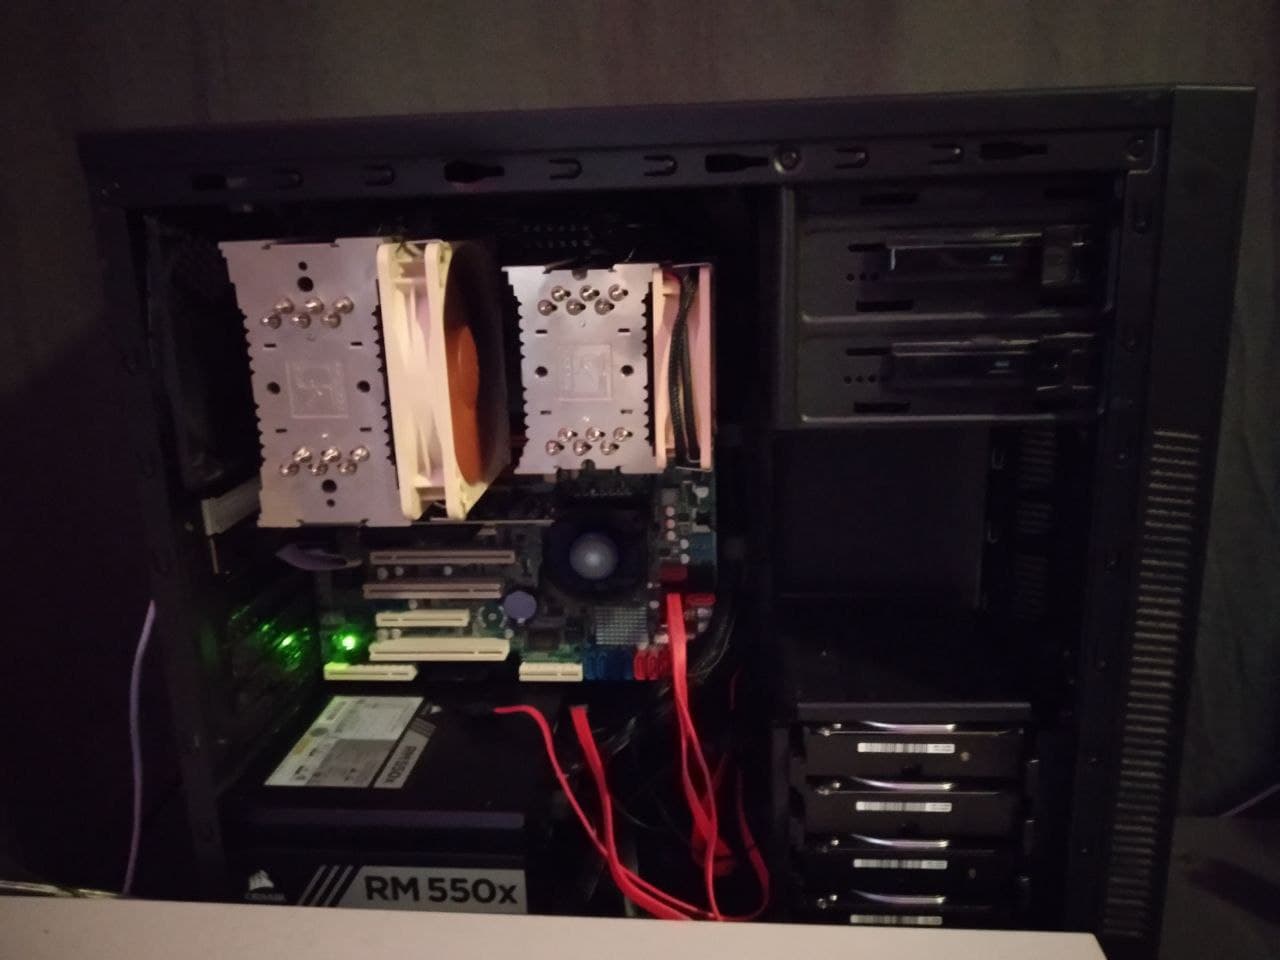
And there you have it, my ultimate freedom machine, fully assembled.